An order we recently prepared for Israel was a useful reminder: this trim can leave our warehouse quickly, but only after the door position is settled. The four pieces sit in the same general area and look closely related, yet the RebornFJ listing treats them as separate left-front, right-front, left-rear, and right-rear parts. One selection is one piece for one door position, not a four-piece set.
Our rule for matching this order was simple: use the door position, the reference number on the removed trim, and the vehicle VIN together. The listing groups all four options on one page; it does not make the pieces interchangeable.
Four positions, four reference codes
The option-to-code mapping below comes directly from the current RebornFJ product data.
| Door position | Reference code |
|---|---|
| Left front | 5006411XVC01A |
| Right front | 5006412XVC01A |
| Left rear | 5006511XVC01A |
| Right rear | 5006512XVC01A |
The listing photo includes a close view of 5006512XVC01A, the right-rear reference. The same product image is currently displayed for all four selectable positions, so the picture alone should not be used to choose another corner of the vehicle.
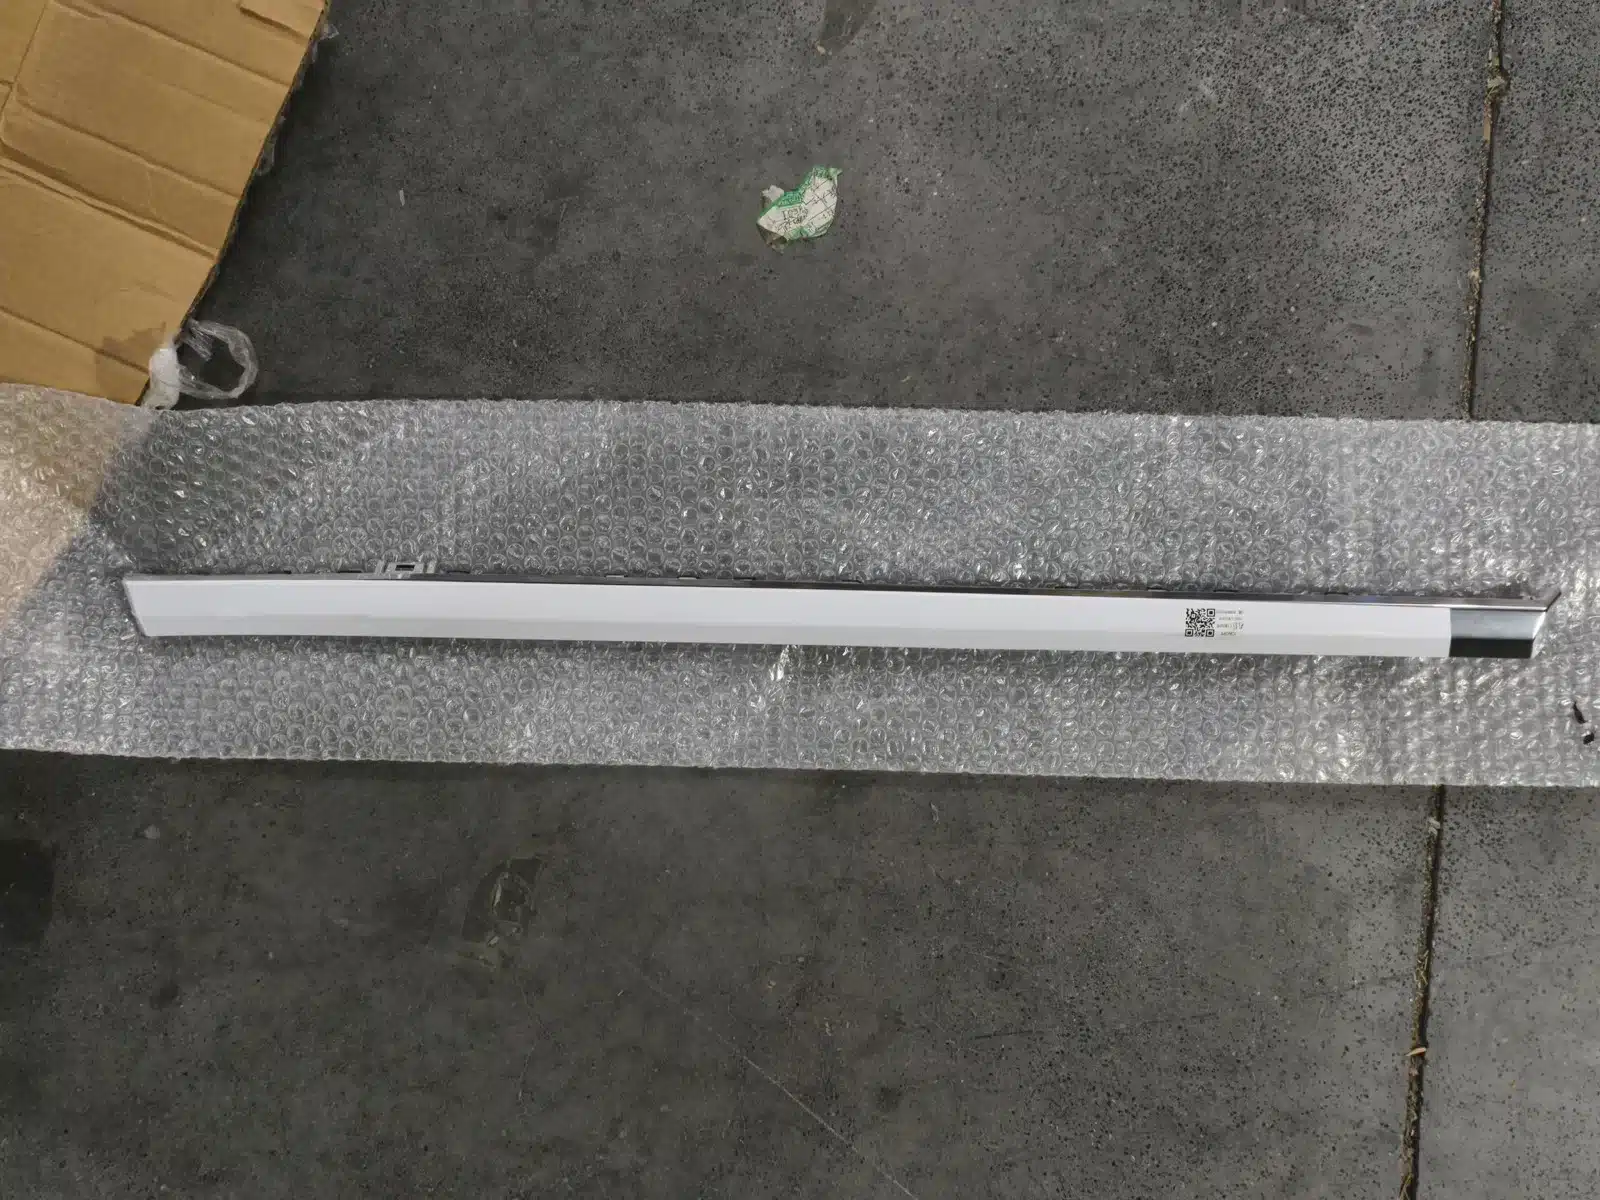
“Left” and “right” are read from the driver’s forward-facing position, not from someone standing in front of the car. When the old trim is missing, send the VIN and a clear photo of the sill area before ordering.
Mocha on the listing, Coffee 01 in Israel
The product page uses the name GWM WEY Mocha. In Israel, WEY’s official material uses Coffee 01. That naming difference is exactly why a model name by itself is not a safe fitment check.
The reference code matters more. Compare the molded or stamped number on the back of the original trim with its door position, outline, and mounting points. If one detail disagrees, do not talk yourself into the part; confirm it through the VIN or GWM parts information before removing more trim.
Before you pry up the old sill trim
Door-sill pieces are usually held by clips and may overlap a door seal, kick panel, or pillar trim. The exact arrangement can change by market or build date. RebornFJ’s listing does not publish a clip diagram or say that new clips are included.
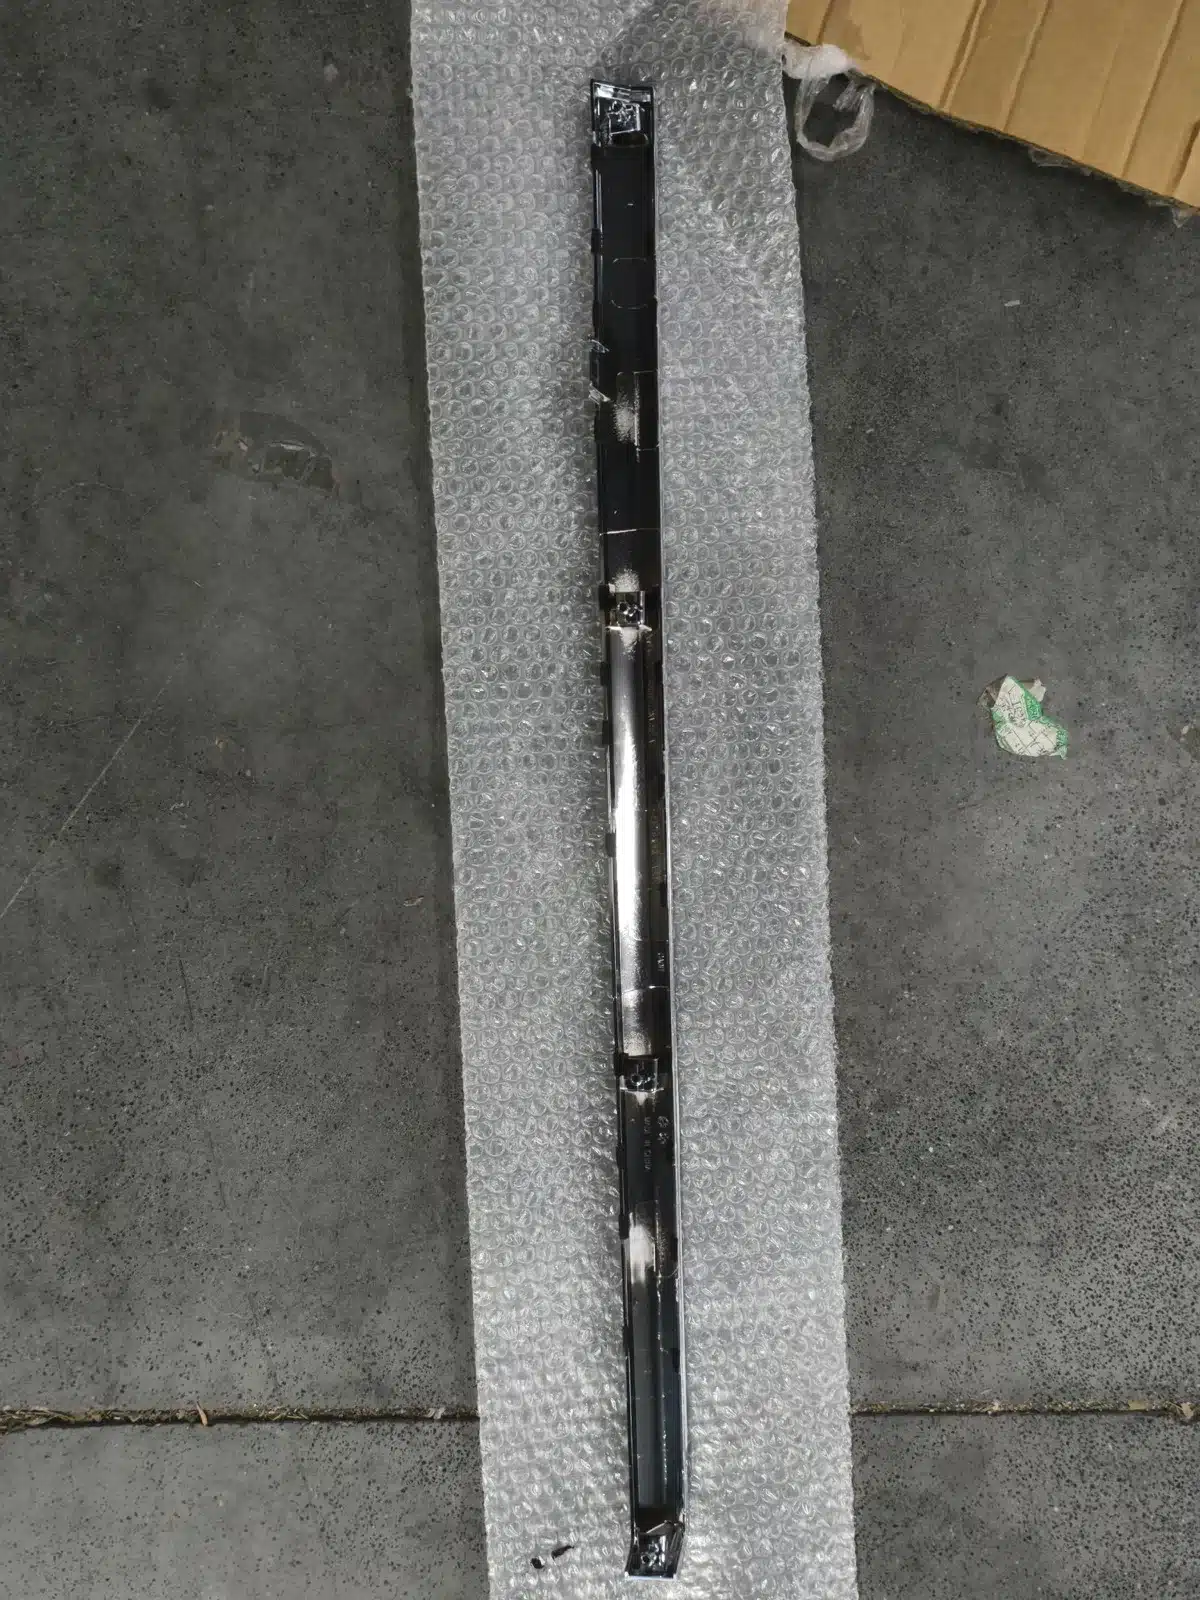
Use the reverse side as a comparison, not as a universal clip diagram.
This warehouse photo shows several clips and locating points along the back of the trim. Compare that pattern with the removed piece before pressing the replacement into place; the correct layout still depends on the selected door position.
Reverse-side view showing the clip and locating-point layout to compare before installation.
Before starting, photograph the existing panel and the way its ends meet the neighboring trim. Vacuum or wipe away loose grit from the threshold so it cannot be dragged across the visible surface. Reach for a plastic trim tool rather than a screwdriver, and work close to each fastener instead of bending the long panel from the middle.
Stop when resistance changes. Check whether the weatherstrip is trapping an edge, another panel overlaps it, or a hidden fastener is still engaged. For vehicle-specific removal information, use GWM technical service information or a workshop familiar with the model.
A safer removal and refitting sequence
- Confirm the door position and record the original reference number before opening the packaging on the replacement.
- Protect the sill and nearby paint, then lift the weatherstrip only where access requires it.
- Start at the accessible end with a plastic trim tool and release one clip at a time. Keep upward force close to the clip.
- Compare the old and new pieces on a bench: length, end shape, clip locations, locating tabs, and surface finish.
- Inspect every clip and grommet. Replace damaged retainers rather than asking the new trim to hold on a distorted clip.
- Test the position before pressing anything home. Once the ends and clips line up, press at each fastener location rather than along the unsupported span.
- Refit the weatherstrip and check that the trim sits flat, the seal is not pinched, and the door closes normally.
That bench comparison is the point we would not skip. A wrong-position trim can look almost convincing until the final clip or end profile refuses to align.
What the Israel order tells us about dispatch
That Israeli order came from stock our warehouse team identifies as original equipment. At the time of writing, all four listed positions were stocked in quantity, so the selected piece could be dispatched without waiting for a special production run.
This China-to-Israel shipment was arranged on a 5–7 day transport service. That is the quoted transit window for this route and order; it is not a promise that every parcel will reach every address on the same clock. Customs inspection, local holidays, and final delivery can still change the door-to-door time.
For an Israel-bound order, send the Coffee 01 model information together with the VIN and the code from the old piece. That bridges the local model name and the listing option before the parcel leaves the warehouse.
Three questions worth answering before ordering
Does one option include all four trims?
No. The current listing is a variable product, and each selection corresponds to one door position.
Can the correct trim be chosen from a vehicle photo?
A photo helps, especially when the old piece is missing, but it should not replace the reference code and VIN check. The four parts are position-specific.
Are installation clips included?
The listing does not confirm included clips or other fitting hardware. Check the condition of the original retainers and ask us to confirm the package contents if you need clips.
Check the code before the parcel leaves
Use the GWM WEY Mocha door sill trim product page to select the door position. When the old trim is missing or the stamped number is unclear, contact RebornFJ with the VIN, door position, and clear photos of the threshold and mounting points.
Sources checked: RebornFJ product and variation data; official WEY Coffee 01 information for Israel; official WEY Europe EPC-TIS service information.